
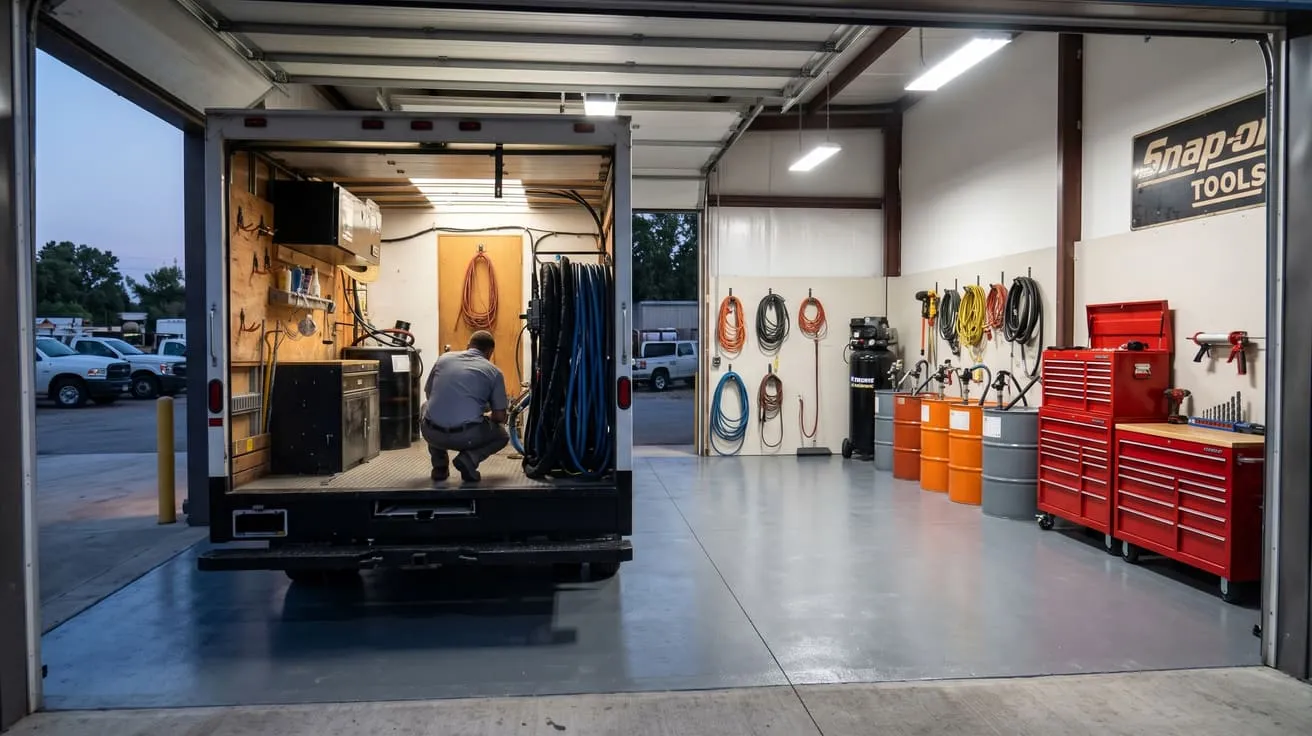
It’s the first warm week of spring. The phone has been ringing since March, the schedule is full, and the rig hasn’t run since November. You start the generator, bring the reactor up, and something doesn’t sound right. Whatever it turns out to be, it was cheap to fix in January.
Every piece of equipment on a rig comes with a manual full of maintenance intervals, and you should follow them. This isn’t a rewrite of those manuals. It’s the short list of things we’ve actually done on our own rigs, learned over more than a decade of concrete raising.
What this is based on
Our experience is with HMI-built rigs and the older style of Graco Reactor E-20, the ones that move TSL (throat seal liquid)A lubricating liquid kept in the wet cup on a proportioner’s A-side pump, so the pump rod never carries isocyanate into open air. through the Wet cupThe small reservoir around the top of the A-side pump rod, filled with throat seal liquid to keep isocyanate on the rod away from air and moisture. with a pair of check valves. We’ve run box trucks and a trailer, powered by Winco generators and diesel units. We also have experience with Jenny and Saylor Beall compressors and a few different refrigerated air dryers. The Transfer pumpThe pump that moves each chemical from its drum to the proportioner. feeding the reactor have been IPM-1s.
If your rig is newer or built differently, some of this applies directly and some of it simply won’t. Your manuals and direction from your equipment supplier come first. What follows is just an account of what we’ve found worth doing. We’re not speaking for HMI or any other manufacturer mentioned here. It’s simply what’s worked for us.
Loose connections can start fires
If you take one thing from this post, take this one. Loose electrical connections can cause fires. A connection that has worked loose doesn’t just stop working. It heats up, the heat oxidizes the contact, the contact gets worse, and it keeps going until it chars insulation or melts a terminal. A rig gets towed every day and runs a generator all day, hoses get dragged in and out, so connections work loose.
Four places to check:
- the main power connections from the generator to the panel
- every breaker terminal in the panel
- the Heated hoseThe insulated hose that carries both chemicals from the proportioner to the gun, heated to keep them at working temperature.’s electrical connections, at the joint every 50 feet. Don’t open the hose every year just to look. Check them whenever you already have a joint apart, and right away if a joint feels exceptionally hot or you smell something burning
- the battery terminals and cable connections on the generators, which loosen over time too
Do it with the power off and locked out at the source. You’re looking for anything loose, any terminal that’s discolored, and any insulation that’s gone brittle or soft near a connection. Tighten to the manufacturer’s spec. If you’re not comfortable working in a panel, this is a job for an electrician, and it’s still worth paying for every year.
During the season
These don’t wait for winter. They get checked while the rig is working.
On an older reactor, make sure TSL is pumping every stroke. Watch the TSL lines while the pump rod strokes. Fluid should move every time. When one of those check valves sticks, circulation stops with no warning, and the A-sideThe isocyanate half of a two-part polyurethane system, and the side of the proportioner that pumps it. The B-side carries the resin blend. Throat sealThe seal around a pump rod where it leaves the pump. Isocyanate that crystallizes on the rod wears it. pays for it. We got tired of checking and replaced the check valves with a continuous pump, but until you do something like that, it’s a daily look.
Check the inlet screens. Graco Reactors have an inlet screen (the Y-strainer) in the A and B inlet plumbing. Check both at least once a season. A screen that’s plugging up restricts the material getting to the pumps.
Give the transfer pumps oil. IPM’s own installation drawing shows an air line lubricator on the pump’s air supply, and we added them to ours. Without one, nothing puts oil into the air that drives the pump’s air motor unless you remember to do it. A lot of people try to remember to spray a lubricant into the top of the pump on a weekly basis, and that’s how we started. However, continuous beats weekly. If yours doesn’t have lubricators, they’re a cheap part to add. As a side note, if a lubricator is set too high (sending too much oil) the pump exhaust can become saturated with oil. Be sure to set the lubrication rate low enough to avoid this. The pump will still get enough lubrication at a low setting.
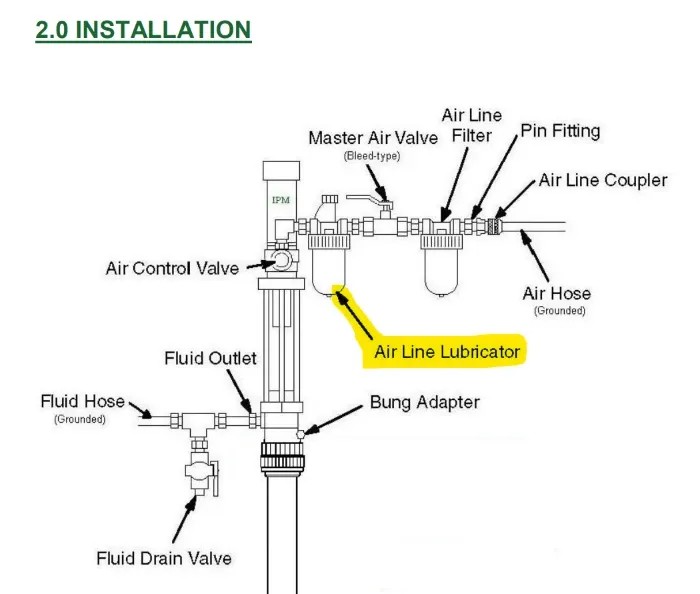
From IPM's installation drawing for its transfer pumps. The air line lubricator (highlighted) sits on the air supply, between the pump and the master air valve.
Run 15W-50 synthetic in a gas Winco. This one is specific to the gas Winco generators with Briggs & Stratton Vanguard engines. Mounted inside a trailer or box truck, heat is a bigger problem than it would be in open air. A Winco on a slide that rolls out of a van isn’t safe from it either: in southern states it sits in radiant heat from the sun. We’ve run Mobil 1 15W-50 full synthetic, because we feel the heavier oil does a better job of protecting the engine in that heat. Winco’s manual lists synthetic 15W-50 for these engines, at the hot end of its oil chart, but most people never think to use it. If you don’t have the manual for your model, Winco’s service and support page is the place to start. Change it early rather than on time, which is the same habit we push in the maintenance section of our startup guide.
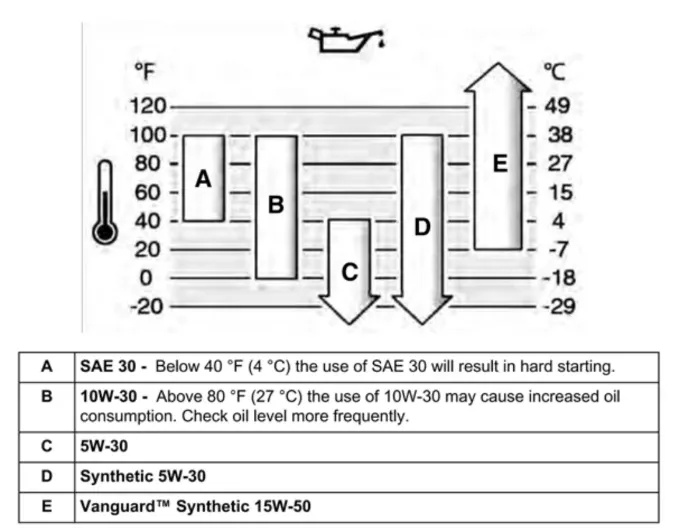
The oil chart for Briggs & Stratton Vanguard engines, from Winco's manual. Synthetic 15W-50 (E) runs from about 20°F to past 120°F, the top of the chart.
The diesels are different. We haven’t run synthetic in them. They’re water-cooled, so the heat affects them much less. But the same rule applies: change the oil and filters early rather than on time. The diesel engines are also more sensitive to fuel quality, so we’ve used a fuel additive that keeps the injectors clean and the fuel system free of water.
Keep the dust out. Concrete dust is the rig’s enemy, and keeping it out of and away from the rig matters more than most people think. The rig’s ventilation fans pull outside air in, and the air compressor and generator always want clean air. Dust that gets in plugs their intake filters and coats everything else.
Whenever a concrete saw is running, keep the rig out of the dust path, or park it upwind. Bag or bucket the dust from drilling injection holes, and keep those bags and containers closed, so nothing gets dumped or spilled in the rig. Some dust still rides back in every day, so keep the radiators on the generator and the air dryer clean, and check the intake filters on the generator and compressor often, cleaning or replacing them when they’re dirty.
Keep the hose guarded. The heated hose’s protective cover is the only thing between the hose and the concrete it gets dragged across. Repair a worn or torn section the day you notice it. Preventative maintenance is the key. The only thing worse than rebuilding reactor pumps is having to open up the injection hose and search for a problem.
At the end of the season
In northern regions, winter is when the schedule is thin, so it’s when the bigger maintenance jobs get done.
Clean out the reactor control cabinet. We’ve done this every season, because that drilling dust gets into the electronics too. Wash down every circuit board with a good electronics cleaner. Then unplug every plug on the boards themselves, including the motor control board and the heater modules, and clean each plug connection with a contact cleaner made for exactly that job. Take a photo before you unplug anything, so every plug goes back where it came from.
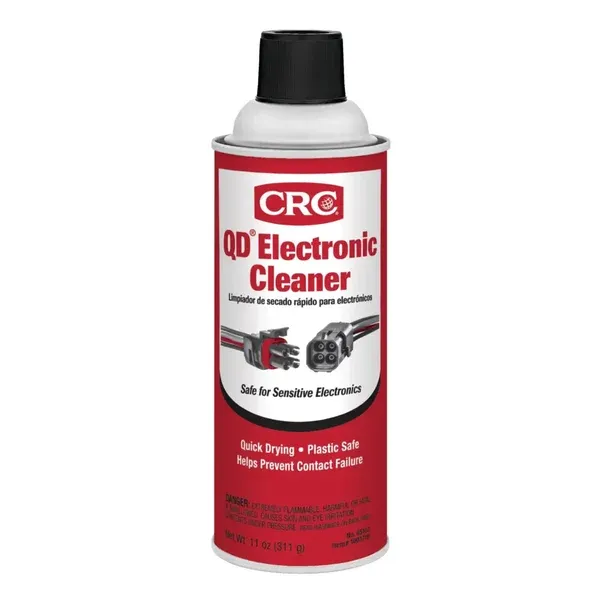
CRC QD Electronic Cleaner
Washing down the circuit boards
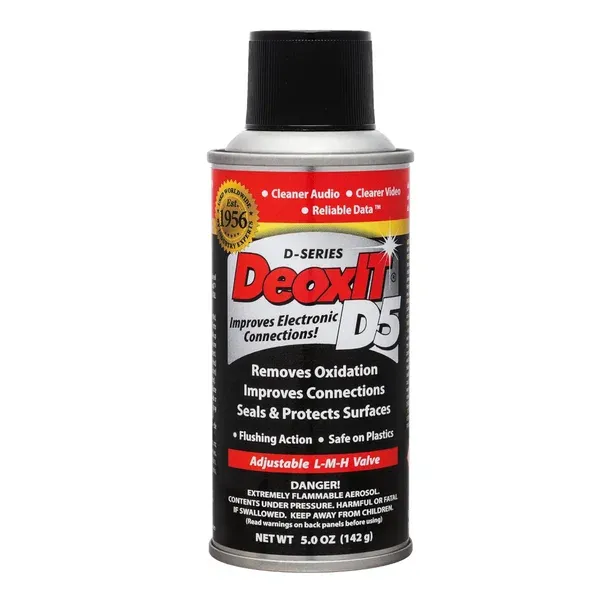
DeoxIT D5
Cleaning the plug connections
On an E-20, give the motor control board’s pressure transducer inputs extra attention. They’re phone-jack style connectors, one for the A side (J3) and one for the B side (J8). In our experience it’s a poor design, and those connections get flaky at times. A routine cleaning keeps them healthy.
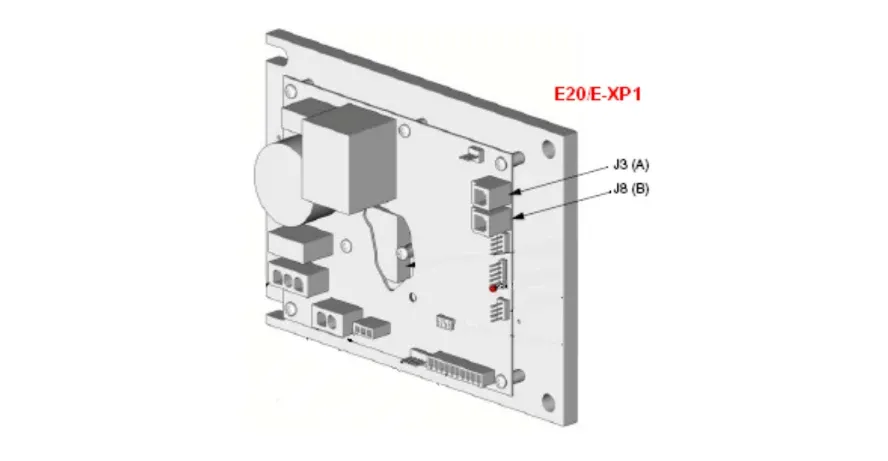
From Graco's manual: the E-20 / E-XP1 motor control board. J3 and J8 are the A-side and B-side pressure transducer inputs.
Break down the transfer pumps. Take the IPM-1s apart, inspect them, and replace the seals as needed. Aftermarket repair kits are available for them. This is also where a spare pays for itself: we’ve kept a spare pump on every rig, so a failure in the season is a quick swap and the rebuild waits until now, when nobody is waiting on you.
Check the valve gaps on the generator engines. Valve clearance drifts with hours, and an engine that runs all day every day puts on hours fast. Check it to the engine maker’s spec, on the Winco and on the diesel builds alike. If you’d rather not do it yourself, a small engine mechanic can, and the bill is small next to an engine that doesn’t run right or won’t start at all.
Pull the vents and look at the diesel radiators. On a diesel generator the radiator often sits behind a vent in the side of the truck or trailer, so you can’t see how plugged it really is. Once a year, take the side vents off, inspect the radiator closely and thoroughly, and make sure it’s clean. While you’re in there, check belt tension. A loose belt lets the water pump or the alternator slip, and neither does its job properly when it’s slipping.
Service the Saylor Beall compressors. Follow Saylor Beall’s manual for your model. Saylor Beall calls for checking belt tension monthly and inspecting the valves quarterly. When we’ve done the valves, we’ve pulled each one, one at a time, and inspected it to make sure it’s operating properly before it goes back in. We’ve kept a spare set of valves and gaskets on hand, so a bad one gets replaced on the spot instead of waiting on parts. Saylor Beall also sells a valve cover removal tool, and it makes this job much easier.
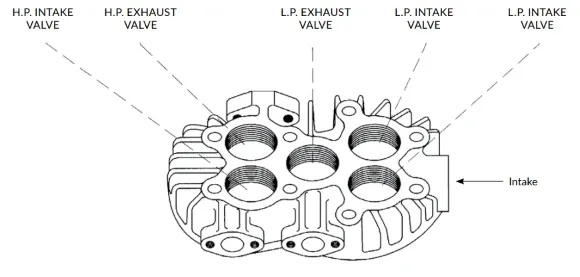
From Saylor Beall's manual: the intake and exhaust valve positions for both the high- and low-pressure stages on a two-stage head.
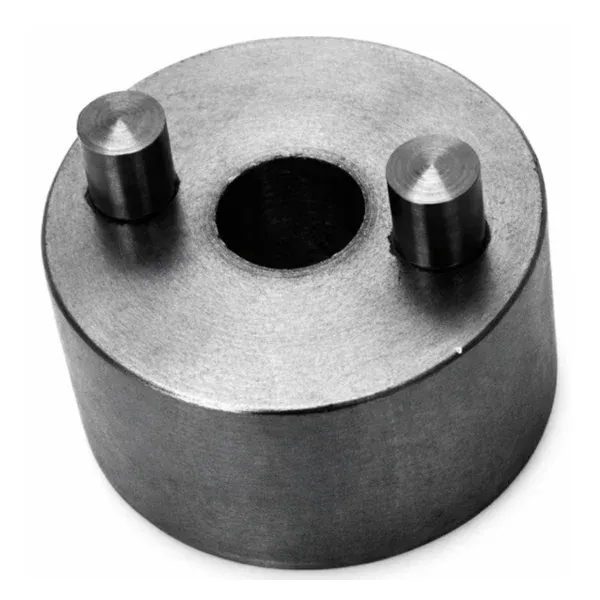
Valve cover removal tool
Sold by Saylor Beall
Keep a spare unloader valve on hand too. Unloaders only last so long, but swapping a good one out early just throws away the life it has left. With a spare on the shelf, you can run the one you have until it actually fails, then change it without waiting on parts.
Grease the trailer wheel bearings. A rig is heavy for its size and gets towed every working day. A dry bearing is a roadside failure waiting to happen.
Storing it for the winter
Leaving material sitting still in the system for months is how you end up with hardened material and a repair bill in spring.
Flushing is the best and safest route. HMI’s 2-part flushing kit has a flushing solution that clears material from the lines, and a storage solution that stays in the system to help keep residual A-side material from hardening with moisture. It follows Graco’s long-term storage guidelines and comes with step-by-step instructions, and HMI has a video walking through the whole flushing procedure. If you’re putting a rig away for the winter, that’s the way to do it.
Whether you’re flushing or recirculating, cover both paths. The first is pumping down the main line. The second is putting the reactor into recirculate mode, which forces the flush or the material back through the recirculate line, the small hose that comes off the reactor and threads directly back into the transfer pump. One mistake we’ve seen is flushing only the main line and calling it done, which leaves the recirculate line untouched. And keep flushing solution out of your material barrels. Follow the kit’s instructions for where it goes.
What we’ve done instead. We’ll be honest: we’ve never flushed our rigs for the winter. We’ve recirculated the A side every three weeks, with the reactor plugged into shore power and running on shop compressed air, so it can be done without pulling the rig outside or starting the generator. We run both paths, and since it’s only raw product with no flushing material in it, it can go straight back to the barrel. It’s a commitment, though. The whole point is that the material never sits for long, so if three weeks drifts to three months, you’ve lost the benefit and you’re storing a full system you didn’t flush.
If there’s any doubt you’ll keep to that schedule, flush. The rig that has trouble in spring is usually the one parked in November with no plan at all.
Treat the fuel before it sits
The material isn’t the only thing sitting all winter. If the generator won’t be started for months, the fuel in it is going stale.
Stabilize the gasoline. Gasoline breaks down as it sits, and stale fuel gums up a carburetor. Add a fuel stabilizer to the tank on the gas Wincos before they’re parked, then run the engine for a few minutes so treated fuel reaches the carburetor.
Treat the diesel. Diesel has its own winter problems. It can gel in the cold, and water that collects in a tank causes trouble of its own. Keep using the fuel additive through the winter, and make sure it’s one made for cold weather, dosed as the bottle says.
The bottom line
Most of what’s here is in a manual somewhere. The difference is doing it on a schedule, in the slow months, instead of finding out in April. A tight connection, a pump that’s getting oil and a cabinet without a season’s dust in it are cheap in winter. The same problems cost a lot more in May, with a full schedule and customers waiting.